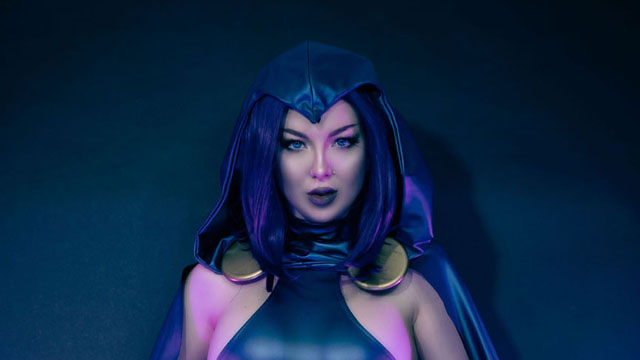
Note From the Editor: This week, Superhero Hype’s cosplay correspondent, Ashlynne Dae, is showing us the steps she took while creating her Raven cosplay. While the Teen Titans animated series Raven may be more well known, Ashylynne’s choice this week was inspired by Raven’s original stint in The Teen Titans comics by Marv Wolfman and artist George Perez.
Hello sparkling humans! I’m going to talk a bit about how I made my classic Raven cosplay! Now, you all know by now I love making multitasking cosplay pieces when possible, to avoid using more material than necessary, save on the repetitive work of making something almost identical to something already in my cosplay wardrobe and to save money!
You may also recognize the leotard and gloves and boots from my Psylocke cosplay! So I won’t cover how I made those, since I already touched on that. But I will talk about how I made the hooded cape, belt and boot tops!
Once I had the cape cut out, I cut four hood pieces, two for the outside and two for the lining.
RELATED: Superhero Hype Cosplay: Poison Ivy
I hope you’ve enjoyed this breakdown of how I made my Classic Raven cosplay! Thanks so much for reading!
You can get these pictures and more photo sets at ashlynnedae.com.
Patreon: patreon.com/ashlynnedae
Instagram: @ashlynnedae
Only Fans: onlyfans.com/ashlynnedae
Official Site: ashlynnedae.com
Superhero Hype Cosplay: Creating Raven from The Teen Titans
-
Superhero Hype Cosplay: Creating Raven from The Teen Titans #1

I didn’t bother lining the cape because the fabric is stretch and doing so may cause the bottom of the cape to warp while sewing. So the raw edge would be cleaner than lining or hemming and the back of the fabric was black already, which is the color I would have lined it!
-
Superhero Hype Cosplay: Creating Raven from The Teen Titans #2

Once I finished the hoods, I sewed both right sides together along the face opening. This is a cowl hood, so there is not a front opening.
When the hood is worn, it drapes nicely across the top of the chest. The hood is also massively oversized (for the drama!), so the excess must be pleated onto the neckline of the cape to fit.
I still leave a space at the center front so the front of the cape edges don’t touch, and also so it hangs farther back off the shoulders. Once the pleats are where you like them, and evenly spaced, sew the hood right sides together to the cape neckline.
-
Superhero Hype Cosplay: Creating Raven from The Teen Titans #3

There will be an open edge at the front of the hood’s cowl where the hood and hood linings meet, I just tucked it under the seam allowance there, and topstitched as it wouldn’t be seen when worn.
Once the cape was taken care of I started on the boot tops. I used the base of my Psylocke boots, but Raven’s boot tops have a cut-out and a point. So I made boot toppers to wear under the already existing Psylocke boots!
-
Superhero Hype Cosplay: Creating Raven from The Teen Titans #4

I spent longer than I would have liked puzzling out how I would achieve this cleanly, but I finally worked it out! I ended up layering each piece to form the cut out.
I cut two of the tops and two of the bottoms (for lining and face), stitched them to their respective lining piece, and turned out and topstitched all the edges so they would stay in place.
Then I lay the smaller triangle on top of the larger funky shaped triangle and stitched them together along the topstitched lines of the smaller triangle.
-
Superhero Hype Cosplay: Creating Raven from The Teen Titans #5
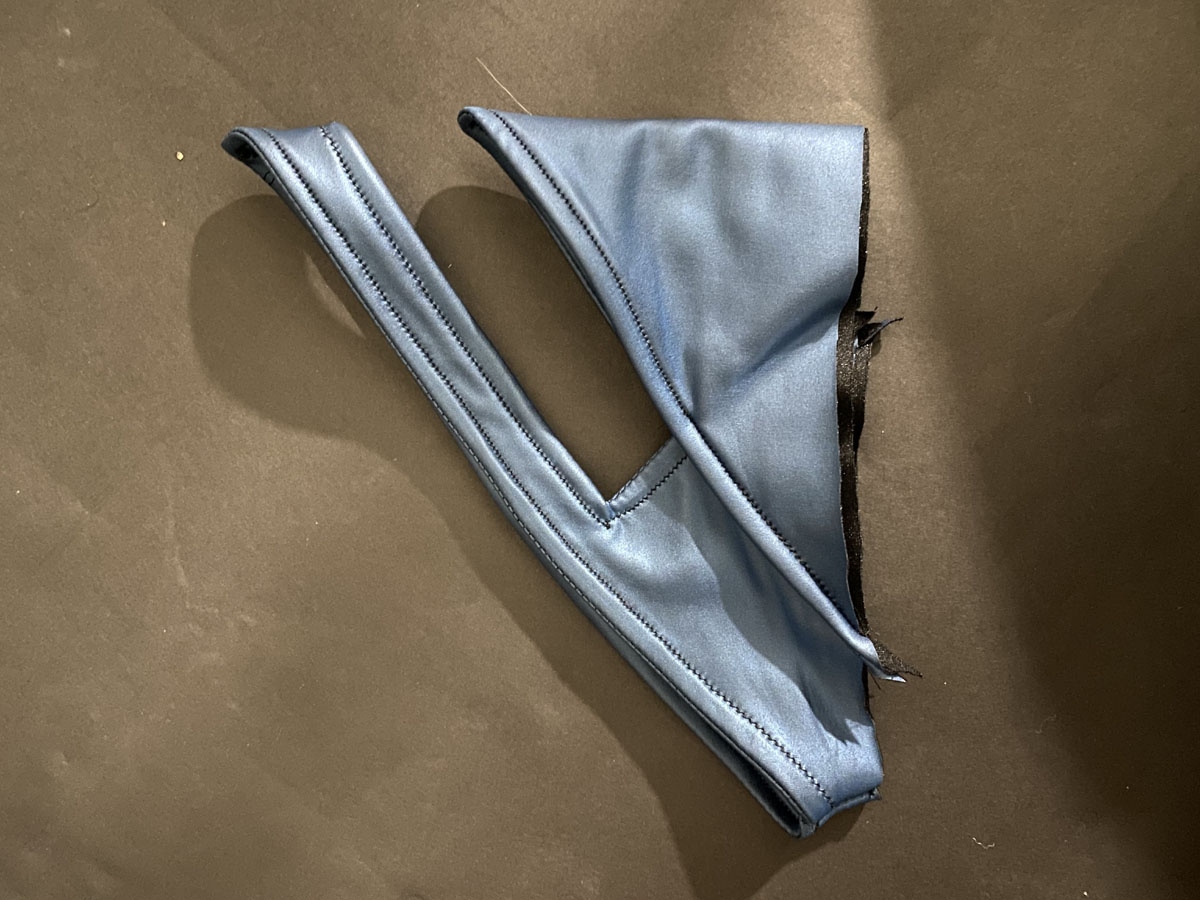
Once secure, I stitched the right sides together at the very small back seam and I had boot toppers! I wore these just tucked into the boots for my shoot.
But they would not hold up to convention wear and all the walking around if not secured to the boots in some way.
-
Superhero Hype Cosplay: Creating Raven from The Teen Titans #6
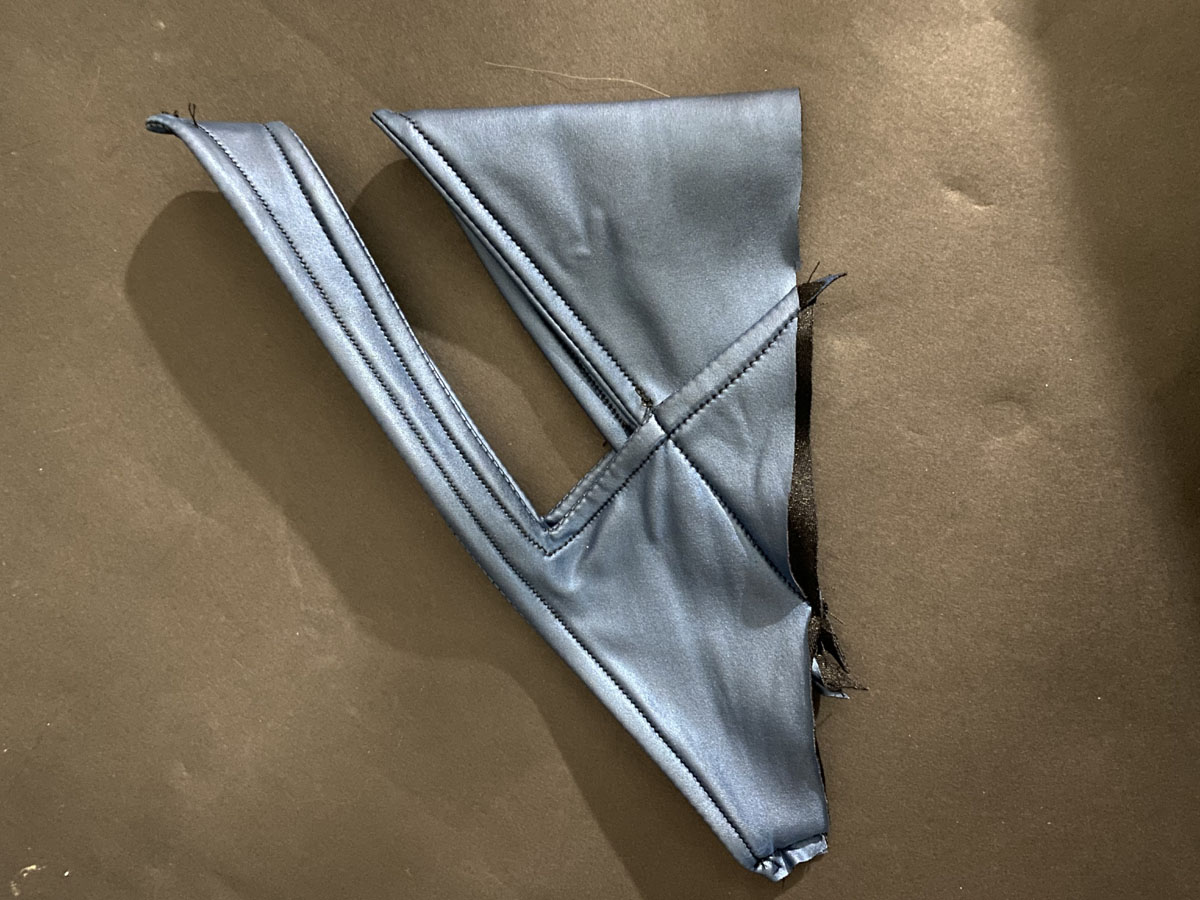
I would either tape them in with heavy duty fabric tape or stitch them on if I didn’t want to be able to use the boots for Psylocke again.
But since this was just a shoot for now, just tucking them worked perfectly!
-
Superhero Hype Cosplay: Creating Raven from The Teen Titans #7
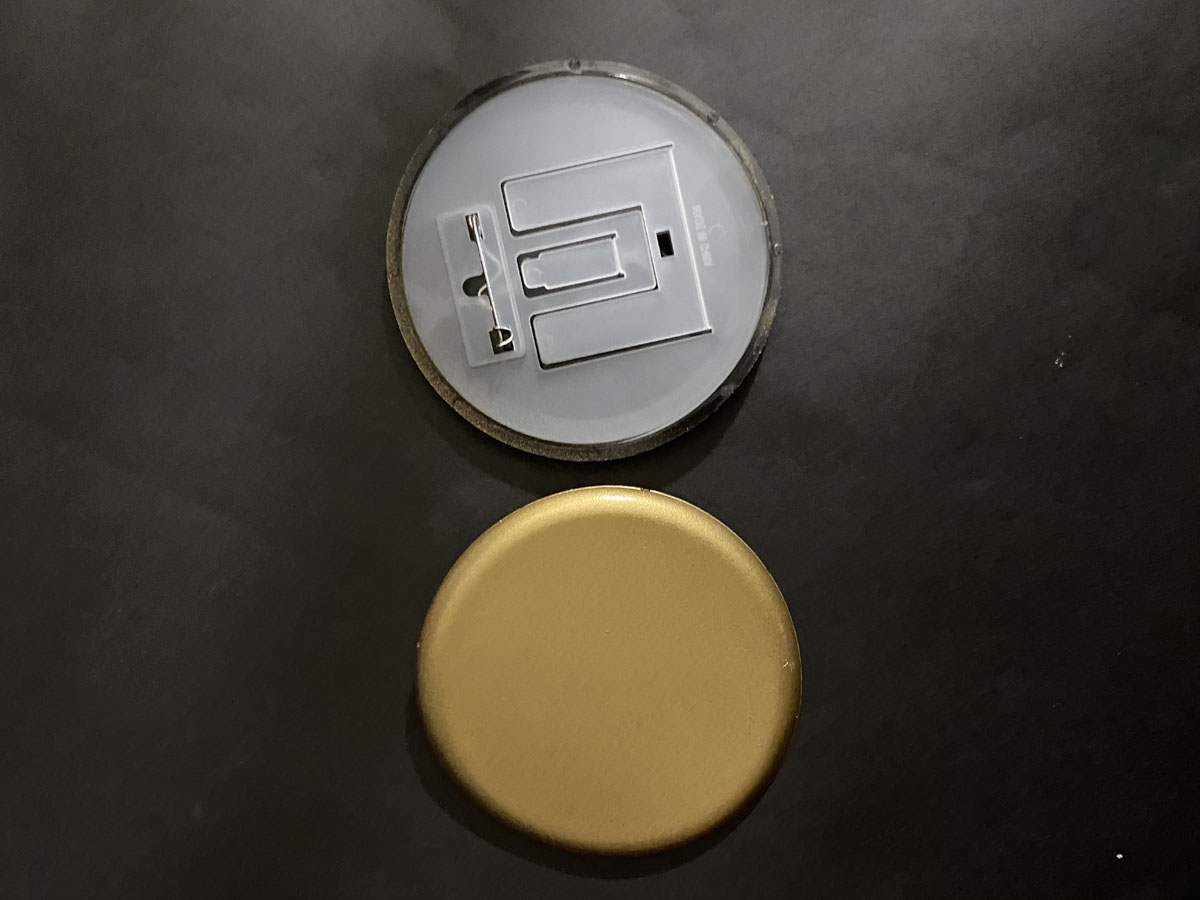
Now that the boots were finished, I set to work on the belt and the shoulder medallions! I took an easy route and used blank button making kits I grabbed from Hobby Lobby as my belt and shoulder medallions.
All I did was snap them together and paint the top gold. They already have a pin in the back so they can be moved around and used for other costumes as well.
-
Superhero Hype Cosplay: Creating Raven from The Teen Titans #8
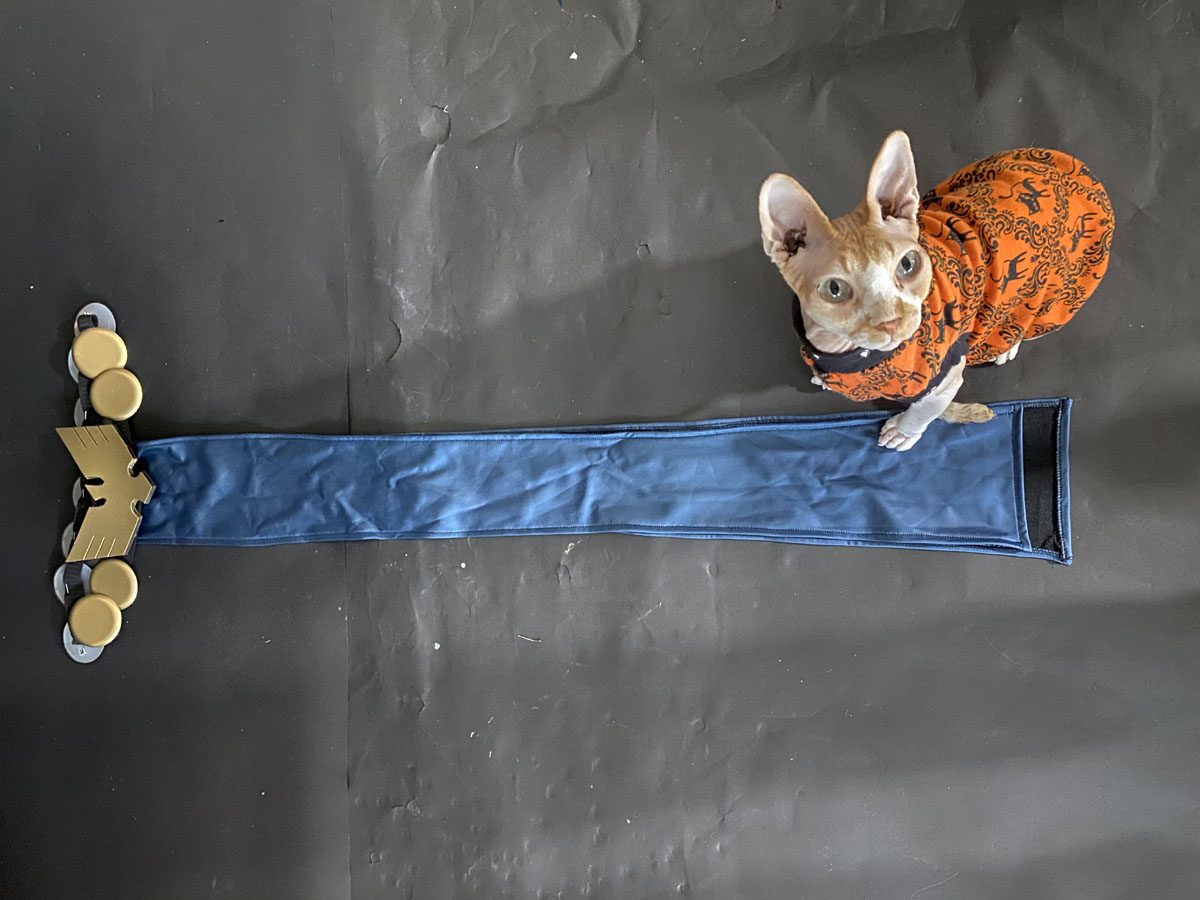
The two shoulder pieces are the same, just a slightly larger size. The Raven symbol at the center of the belt is just a piece of EVA foam I cut out using a template I drew based off the comics, and spray Plastidipped before painting to seal and protect the foam.
Once that was done I glued a brooch pin to the back and attached all of the medallions to an elastic belt. I then cut two long strips of fabric to be my skirts and gave them a hem to match the hem detail of the leotard. I also attached those two pieces to the belt’s front and back
-
Superhero Hype Cosplay: Creating Raven from The Teen Titans #9

I tried all of it on together to make sure it all lined up and BAM! Raven was complete!
-
Superhero Hype Cosplay: Creating Raven from The Teen Titans #10

I used the same technique in constructing the cape for my Teen Titans Animated Series Raven cape as well, so you can use this method of cape making for that version as well!
