Note From the Editor: This week, Superhero Hype’s cosplay correspondent, Ashlynne Dae, is getting into the Christmas spirit with a Holiday-inspired take on Harley Quinn. You may not be familiar with it, but it is based on a comic book cover.
Hello lovely humans! Happy Holiday Season! This week, I’m going to talk a bit about a holiday cosplay that has been on my to-make list for years now! This is based on Amanda Conner’s cover for the Harley Quinn Holiday Special, which was published in 2015.
RELATED: Superhero Hype Cosplay: Creating Raven
I hope you all enjoyed this little cosplay article. And I also hope you all have a Happy Holiday season!!
You can get this full set on Patreon through the end of December.
Patreon: patreon.com/ashlynnedae
Instagram: @ashlynnedae
Only Fans: onlyfans.com/ashlynnedae
Official Site: ashlynnedae.com
Superhero Hype Cosplay: Holiday Harley Quinn
-
Superhero Hype Cosplay: Holiday Harley Quinn #1

Since then I have been trying to fit it into my cosplay projects, but it never worked out until now.
-
Superhero Hype Cosplay: Holiday Harley Quinn #2

I am so glad to finally have had the chance to make it, and tell you a bit about how I did it!
-
Superhero Hype Cosplay: Holiday Harley Quinn #3

First, I set about making the pattern for the leotard. I used my basic block and traced it onto pattern paper as per usual. I then drew the new scoop neckline in and cut out the new pattern.
For the hat I drafted a rectangle using half my head circumference as my length measurement, and the measurement from my forehead to the crown of my head. It ended up being 11”x6” for my head.
-
Superhero Hype Cosplay: Holiday Harley Quinn #4

On top of that rectangle, I added a 22 inch triangle to be one half of each hat section, when sewn together they would form the double points seen in Harley’s Santa style hat.
Once all of my pattern pieces were ready, I laid my red fabric and black fabric unfolded right sides together so I only had to cut out once.
-
Superhero Hype Cosplay: Holiday Harley Quinn #5
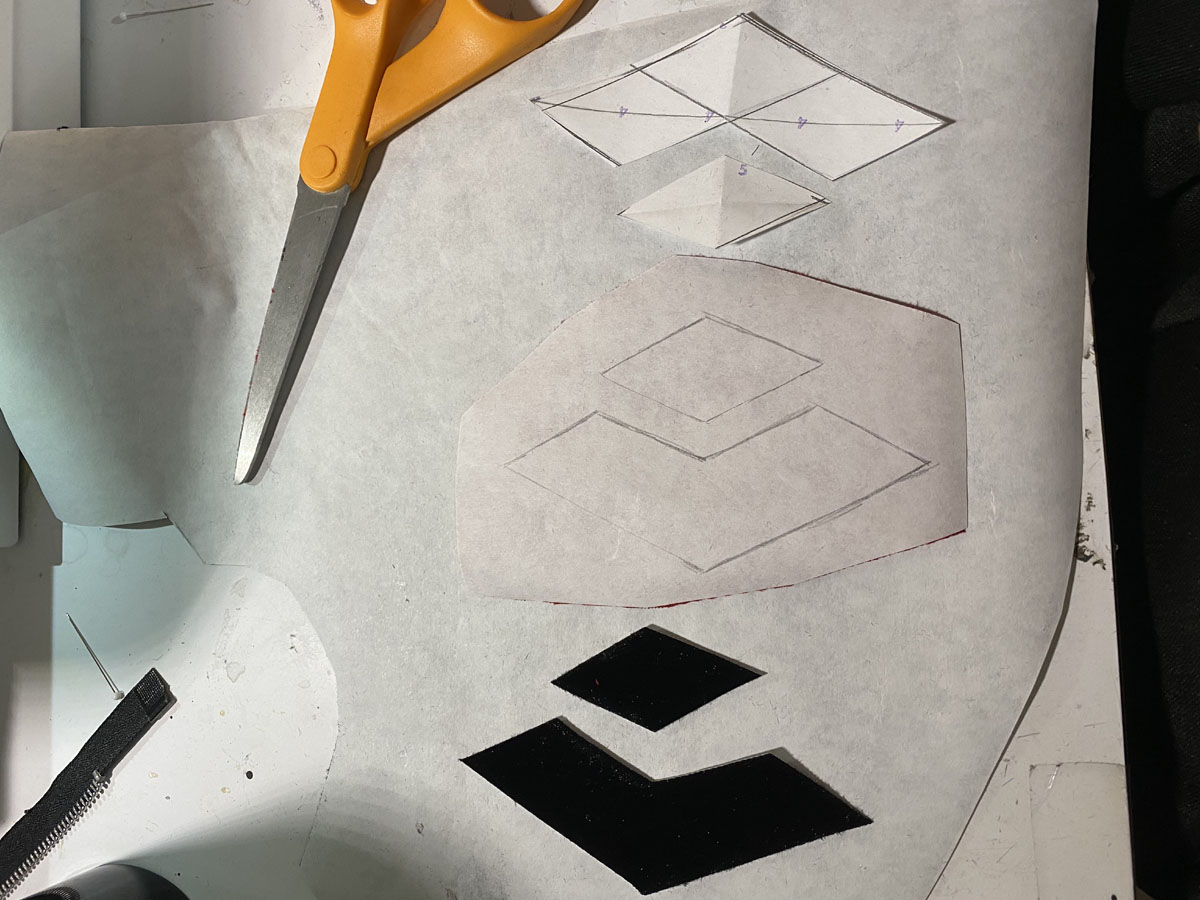
I used black and red stretch velvet for this to add to the warm holiday feeling.
We only need one piece in each color instead of the usual two because of the parti-color design Harley usually sports.
-
Superhero Hype Cosplay: Holiday Harley Quinn #6

Once those were cut out, I patterned the diamond applique patterns for the front and back of the body and the singular one for the sleeve.
I used stretch fusible web adhesive with a paper backing to transfer the design, and then satin stitched the edge to secure the diamonds.
-
Superhero Hype Cosplay: Holiday Harley Quinn #7

After those were secure, I stitched the black front to the red front, and the black back to the red back, and sewed up the side seams, shoulder seams, and crotch seams.
Add in the sleeves to the appropriate colored side, and the body is finished!
-
Superhero Hype Cosplay: Holiday Harley Quinn #8

I then stitched up the hat, folding each side in half and sewing along the angled side for each color.
Then I opened up the shorter sides of the rectangles and stitched the black side to the red side to join the hat together.
-
Superhero Hype Cosplay: Holiday Harley Quinn #9
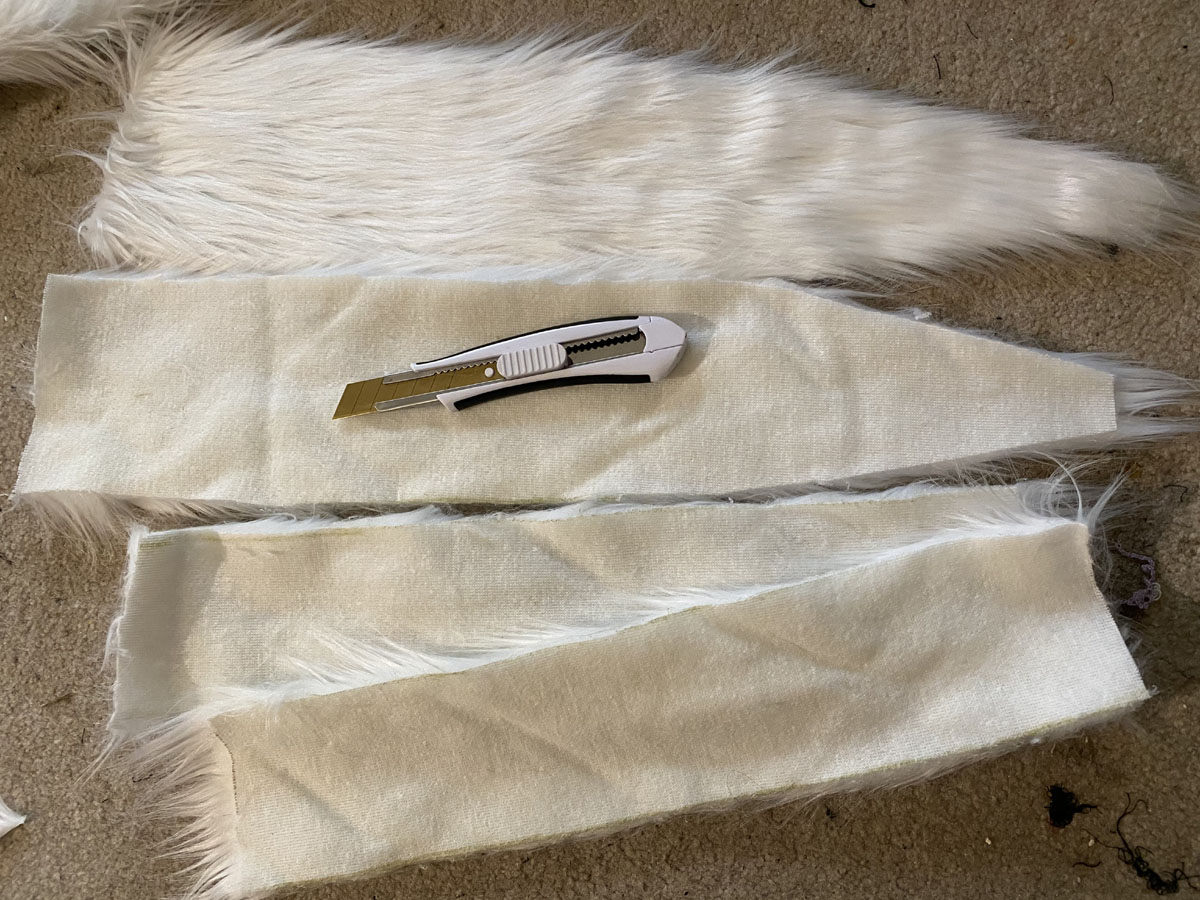
For the fur trim, I cut two lengths of about 15 inches by 3 inches for the leg line, and two for the neckline that were 20 inches by 4 inches.
-
Superhero Hype Cosplay: Holiday Harley Quinn #10

I shaped the ends of both pieces so the finished fur pieces would taper off nicely when sewn.
For the hat trim I cut a long rectangle of fur the circumference of my head by 4 inches.
-
Superhero Hype Cosplay: Holiday Harley Quinn #11

I stitched the hat trim folded in half with the fur pile on the outside, to the right side of the hat.
-
Superhero Hype Cosplay: Holiday Harley Quinn #12

For the legline trim, I hemmed the leg openings with elastic on my serger, and then placed the fur trim folded in half under the hemline and topstitched it on to secure.
The neckline I handled a bit differently. I started hemming the opening in the same way I did for the leg openings, but instead of sewing the fur directly to it, I created sort of a detachable collar by stitch the two short back pieces together and then folding the entire thing in half with the fur side out and topstitching the raw edges together.
-
Superhero Hype Cosplay: Holiday Harley Quinn #13

You won’t see the backing of the fur after brushing it out, nor will it unravel, and any other seam treatment would add too much bulk with this method.
I stitched this piece by hand at the center front with white thread, and then simply pinned the fur collar to the neckline when worn. This makes it reusable on other pieces and removable for easier washing as well.
-
Superhero Hype Cosplay: Holiday Harley Quinn #14

-
Superhero Hype Cosplay: Holiday Harley Quinn #15

I added a few purchased pieces, including the collar, pink gloves, along with fur wrist cuffs I had from another project, and stitched fur pom poms onto the hat ends, and red and black boots.
-
Superhero Hype Cosplay: Holiday Harley Quinn #16

I made jingle bell hair ties as a final piece for the red and black split wig I had for her and Ta-Da! Holiday Harley was complete!
-
Superhero Hype Cosplay: Holiday Harley Quinn #17

I gave a little gift wrap to my mallet and just so happened to have some Batman gift wrap that I thought would make a cute addition.
-
Superhero Hype Cosplay: Holiday Harley Quinn #18

I even added red ornaments to my black tree to add some more Harley flair!


